CNST
Help Guide
Help Guide
Manage
Your Store

Add or Edit Attributes for a Product
Add or Edit Categories, Manufacturers, or Vendors for All Products
| Add
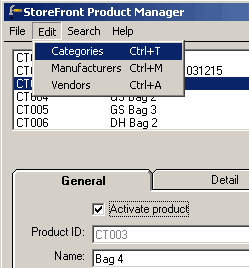
or Edit Categories, Manufacturers, or Vendors for All Products Each product must be placed in a category you create such as bags, clothing, etc. You can also associate a product with a Manufacturer and a Vendor. Modify or add these values using the Edit menu in the Product Manager window. |
||
| Enter the StoreFront
Product Manager. From the Configure Store window, click the Product Manager button. |
||
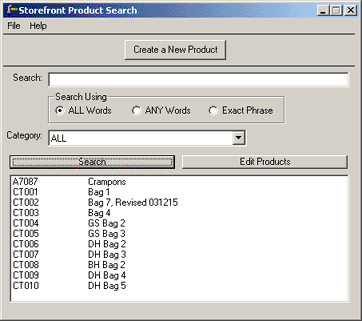
| Open the Product
Management window. Click Edit Products.  |
||
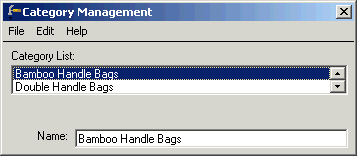
Open the Category,
Manufacturer, or Vendor
Management window.
|
||
Edit a category, manufacturer, or vendor. Be sure to edit only one name and exit the management window. Re-open the window to work on more names. Note: If you receive an error message, restart the computer and login again.
|
||
| Create a category,
manufacturer, or vendor. Be sure to edit
only one name and exit
the management window. Re-open the window to work on more names.
Note: If you receive an error message, restart the computer and login again.
|
||
| Delete a name. Be sure to edit
only one name and exit
the management window. Re-open the window to work on more names.
Note: If you receive an error message, restart the computer and login again.
|
||
| Upload your entire site and visit your group homepage to see the changes. | ||


